How to Clean Your Home Security Cameras: A Comprehensive Guide
Proper maintenance of your home security system is a vital yet often overlooked component of home safety. Just as a car needs an oil change or a computer requires software updates, your security cameras need a little TLC to perform their best. While it might seem daunting, with some patience and the right techniques, you can confidently clean your home security cameras, ensuring a clear and unimpeded view of your surroundings.
Why is Regular Cleaning Vital to Your Security Cameras?
Regularly cleaning your security cameras is paramount for multiple reasons:
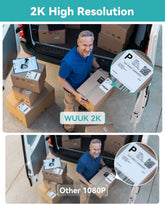
- Clear Images: A clean lens allows the camera to capture clear and precise images. This clarity is crucial in the event of an incident at your home where identifying a face or a vehicle could be paramount.
- Longevity of the Camera: Regular maintenance can help prolong the life of your cameras by preventing any premature damage due to environmental conditions.
- Efficient Performance: Dust and dirt can interfere with the camera's light sensitivity, affecting its performance, particularly in low-light conditions.
The Essentials: Preparing Before You Begin
Preparation is key to successfully cleaning your home security cameras. Before you start, it's crucial to gather the necessary cleaning tools and materials. Having everything readily available not only saves time but also ensures a safe and efficient cleaning process.
- Microfiber Cloth or Lens Cleaning Solution
A microfiber cloth is a must-have tool for cleaning your security cameras. The fine fibers can effectively trap dust and debris without scratching the lens. If your cameras are particularly dirty, a specialized lens cleaning solution can work wonders. Designed not to damage the sensitive lens surface, this solution can dissolve stubborn grime or smudges, ensuring crystal-clear images.
- Air Blower
An air blower is a handy tool to remove loose dust particles from the camera lens without any physical contact. The use of this tool is particularly beneficial for delicate areas where even a microfiber cloth may pose a risk of damage.
- Ladder
Most home security cameras are mounted high for maximum coverage and deterrence. A sturdy ladder ensures that you can reach these elevated cameras safely. Make sure the ladder is stable and in good condition, and always follow ladder safety guidelines.
- Camera's Manual
Last but not least, having your camera's manual on hand can be a lifesaver. This manual contains vital information about the specific cleaning and maintenance requirements for your particular camera model. It may also provide useful troubleshooting tips if you encounter any issues during the cleaning process.
Always remember to be gentle with your equipment. Don't rush, and if you're uncertain about anything, refer to the manual, or contact the manufacturer's customer service.

Step-by-Step Guide to Cleaning Your Home Security Cameras
- Turn Off the Cameras
Before you begin, ensure to turn off your security camera system. Doing so protects both you and the device, preventing any electrical mishaps or potential damage to the camera's internal components.
- Gently Clean the Camera Casing
Use a dry microfiber cloth or a soft brush to gently wipe off any dust, debris, or spider webs on the camera casing. Remember to avoid using any harsh chemicals or abrasive materials as these can damage the camera's exterior.
- Use an Air Blower
An air blower is an excellent tool for removing particles from the camera lens without touching it. This non-contact method can dislodge dust or loose particles that may scratch the lens if wiped with a cloth.
- Apply Lens Cleaning Solution
If your camera's lens is still dirty after using the air blower, it's time to bring out the lens cleaning solution. Apply a small amount of the solution to a microfiber cloth - never directly onto the lens - and gently clean the lens in a circular motion. This solution will dissolve any dirt or smudges without leaving streaks.
- Check the Camera's Positioning
While you're cleaning your security cameras, it's a good time to check the camera's positioning. Ensure they're correctly angled and secured, and that the view isn't obstructed by any new obstructions like growing trees or installed fixtures.
- Turn the Cameras Back On
Once you've finished cleaning, and everything is dry, turn the cameras back on. Check the live feed to ensure that you've successfully cleaned each camera and that the views are clear.
In some cases, repeated unclear images might indicate a more severe issue, such as a damaged lens or internal component. If your camera doesn't provide clear images despite thorough cleaning, consider reaching out to a professional or the camera manufacturer for assistance.
Conclusion
Cleaning your home security cameras may seem like a minor task, but it plays a significant role in maintaining your home's security. Clear, well-functioning cameras not only give you peace of mind but could also be vital in the unfortunate event of a security incident. By following the steps outlined in this guide and committing to a regular cleaning schedule, you can ensure that your home security cameras are always ready to protect your home and your loved ones. Remember, the safety that home security cameras provide is only as good as their maintenance, so keep them clean, clear, and ready to serve their purpose at all times.


